Did you know that one of the biggest interior decor trends for 2020 is wallpapered ceilings?
Well, it’s true. You can already see them everywhere on Pinterest, Instagram, and more. And for good reason. This upgrade can be a relatively hassle-free DIY project that you can finish in as little as a few hours.

If you want your house to stay on-trend, read on. We will give you a step-by-step guide for how to wallpaper your mobile home ceilings. Plus, we’ll take a look at why this is so popular and what looks are “in.”
The lowdown on wallpapered ceilings
Ceilings are one of the most overlooked aspects of a home’s interior. We almost never look up because we know it will probably only be a plain white or cream up there. Although white and cream ceilings can do wonders to offset an already colorful and varied aesthetic, they aren’t your only options.
Undoubtedly, the element of suprise offered by a wallpapered ceiling is one of the factors that explains their rise in popularity.
But this isn’t the first time that people have fallen for this style. Every time the decor seems to fall out of favor, it keeps on coming back. Its invention appears to date to close after the development of paper itself in 105 B.C.E in China.
Why are they so popular?
The versatility of this addition wins people over time and time again. But that’s certainly not the only reason. For many people, its benefits far outweigh those of other options like paint.
Here are some reasons why wallpapered ceilings are trending in 2020:
- Of course, one of the critical benefits of wallpaper on ceilings is that you can easily replace it. Once the pattern starts looking dated, or you want to redecorate, you can slap on some new paper.
- The technology that fabricators use to make wallpaper has taken leaps forward. Thanks to this, the paper is now less of a hassle to apply or remove. And you can cause less damage in the process.
- Nowadays, you can even find thermal wallpaper that insulates your mobile home. You can use this to improve its overall energy efficiency.
- With many more companies jumping in on the market, you have many more design options to choose from.
- Wallpaper can last up to 15 years while a coat of paint usually lasts only for 5 to 10 years.
- Patterns and gradients are in fashion this year. And wallpaper is one of the quickest ways to get this look on your ceiling.
- You can find wallpapers with a great variety of finishes and textures. For example, you can choose among suede, matte, glossy, pearl, glitter, beads, embossed silk, grasscloth, and many, many more options.
- Generally, you can use wallpaper to hide damage to your ceiling (like scratches). And it can also help to protect your ceiling in the future.
- Wallpapering a ceiling can help you change the mood and feel of a room. For example, if you want to create a moody effect, you can use papers with a darker color.
All kinds of different styles and colors are fashionable at the moment. But some of the most popular are retro patterns, art deco, monochromatic palettes, and floral prints. The key to choosing your wallpaper type is to pick one that best fits your personality and the rest of your interior decor.
Guide to wallpapering your ceiling
Generally, wallpapering a ceiling shouldn’t be too hard. Therefore, it should be accessible as a DIY project. Some past experience will help. Yet the most critical factors are probably time, patience, and a steady hand.
However, due to the angle, papering the ceiling will be trickier than installing paper on the wall.
So if you want to guarantee that the application will look flawless, you might want to consider hiring a professional.
Otherwise, you can give it a whirl on your own.
Note that we are primarily going to look at installing paper on a flat and level ceiling. For other ceiling types, you might need to make some adjustments.
It can also be helpful to know beforehand that how smooth and neat the finished project will look depends largely on the texture and seamlessness of the surface.
Supplies
Before we get to the steps, here are all the supplies you’ll need to gather:
- Several rolls of your preferred wallpaper
- Large bucket
- Scissors
- Appropriate wallpaper paste
- Plastic applicator or sponge
- Paint mixer
- Seam roller
- Tape measure
- Putty
- Plastic drop sheets or dust covers
- Masking tape
- Safety goggles
- Ladder
- Sandpaper
- Paintbrush
- Wallpaper primer
- Paint tray
You’ll probably get most of these supplies at the local hardware store or even find them already at home. To spare some time and money you could buy your wallpaper rolls at the local hardware store as well. However, there are many more options for acquiring your paper.
You can get some high-quality paper in most interior decor stores. Nowadays, you can even buy unique rolls online. For example, take a look here at some of the best places to buy wallpaper on the internet.
Steps to hanging wallpaper on your ceiling
You should be able to finish installing the wallpaper in as little as twelve steps. But you should also be aware that some of the steps will take much longer than others. And some steps need to be repeated, too.
Step 1: Protect the floor
Like most renovation projects, this can be a messy job. It’s far better to try to prevent and prepare for any accidents than to try to fix the damage later. That’s why you should protect the floor from any dripping paste or possible debris.
We recommend that you cover the surface and any furniture in the room with a dust cover or plastic drop sheets. For extra peace of mind, you can also protect the walls and any fixtures on the ceiling.
Step 2: Prepare the ceiling
Now, you can start working on the ceiling. The necessity of this step depends on the surface in question.
Safety first, so you should put on your safety goggles. Ready the ladder and ask someone to hold it so that you can reach the ceilings. Then take the putty knife and scrape off any flaking paint.
In other cases, you might want to use some sandpaper to get rid of any bumps or rough surfaces.
You can skip this part if you feel your ceiling is smooth enough.
On top of this, it might help to apply some wallpaper primer on the ceiling. You don’t need to do this if your ceiling is plaster.
But it is necessary for drywall, which is far more common in mobile homes. Doing this will help protect the surface from potential damage caused by the glue and from damage when removing the paper in the future.
Step 3: Measure the ceiling
Next, you should measure the ceiling to find out how much wallpaper you need.
Use the tape first to calculate the width and then the length of the room. Preferably, you want to make these measurements on the ceiling and not the floor (even though the second might sound easier).
Add at least an inch to the figures to allow for some adjustments. You don’t want the paper to come out short.
Make sure you buy enough paper. Some companies might sell them in sheets. However, most of the time, you will need to buy them in rolls that contain 10 yards.

Step 4: Cut the wallpaper
Once you’ve bought the wallpaper, you can cut it into strips of the right size. Use sharp scissors to prevent any snags and jagged edges.
Does the paper have overlapping motifs or patterns?
If the paper does have patterns, you should be mindful of them. While cutting the sections, you should make sure that any designs will match up when you place them next to each other. Or else the pattern might be a bit of an eyesore instead of a crowd-pleaser.
Remember that you want to round up rather than down. You can always trim off the extra paper afterward. But it’s much more difficult to remedy if it’s too short.
After you’ve cut your pieces, you can do a dry fit to double-check that the paper will fit.
Step 5: Mix the paste
Different pastes will have different instructions and need different ratios. So you need to read the manufacturer’s instructions carefully.
Generally, you should pour the required amount of water into the bucket. Then, add the powder and mix it in using the paint mixer. You want to blend it to form a paste. The consistency should be smooth and jelly-like.
In some cases, manufacturers will recommend that you leave it for a while to set.
When it’s ready, you can pour it out into a paint tray.
Step 6: Set up a work table
To spare your back, you can set up a table to work on for the following steps. Any table should work, but the bigger, the better.
Set it up in the middle of the room and cover the surface with a dust cover or plastic sheet
Step 7: Glue and “book” the paper
Spread out a sheet of wallpaper on the table. Start to apply a generous coat of glue with either a paint roller or a 2-3 inch paintbrush.
Begin in the middle and spread the paste to the sides for an even application. You don’t want it to pool up on one spot. Look at the paper from a few different angles and sides to make sure you don’t miss a spot.
Afterward, you should “book” the paper. To do this, you should fold the paper over on itself (glue sides facing each other) and let it sit for about five minutes. This process helps to activate the glue and give the wallpaper the chance to expand.
If the strip is very long, you can fold it in several alternating sections to make it more manageable.
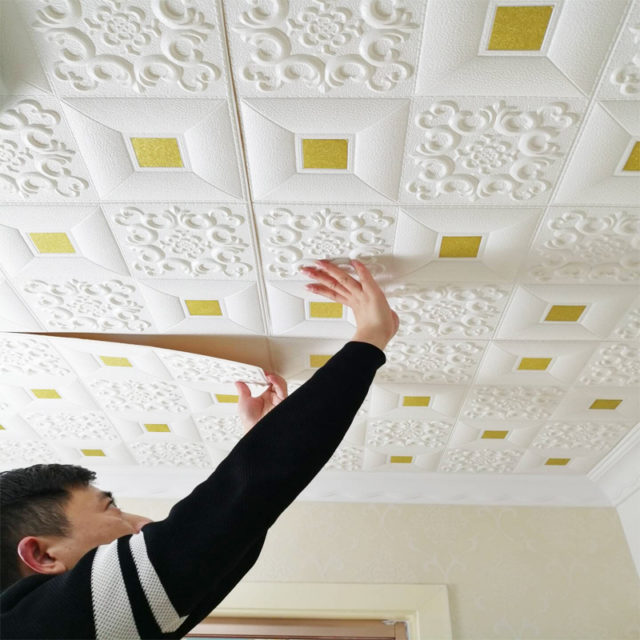
Step 8: Hang the wallpaper
Finally, you can start applying the wallpaper bit-by-bit. Generally, this step is at least a two-person job.
One person needs to get on the ladder and start sticking the first part of the section to the ceiling. And the second person should hold up the remainder of the wallpaper section. They can stand or a ladder, or they can keep it in the air with a mop. Remember to keep the wallpaper paste-side up.
Some people recommend that you start in the middle. But we like starting in one corner of the ceiling. Doing it this way can help you get a neater fit.
Begin by sticking one edge of the wallpaper to the area where the ceiling meets the wall. Line it up as neatly as possible and use your hand to smooth over the center.
Gradually move along the length of the section until it’s all in place. If it’s not sticking well, you can add more paste.
Step 9: Optional – adjust for fixtures
Simultaneously with step 8, you need to follow step nine if applicable. For this, you need to make adjustments for any fixtures on the ceiling by cutting out the needed shape. Preferably, you should do this before you start sticking the wallpaper around it.
Step 10: Smooth over the surface
Once this is done, you need to smooth over the surface of the paper to make sure that it will adhere properly. You also want to remove any bubbles or unevenness.
You can use a plastic applicator or even a sponge to do this. We recommend that you start in the middle of each section and slowly move from there to the edges.
Step 11: Cut the wallpaper to fit
Immediately after you hang each section, you need to trim the edges where it meets the wall. Or else the extra weight might pull the wallpaper down. Use sharp scissors and cut as snugly against the edge as you can.
Step 12: Continue hanging the wallpaper
Repeat steps 8-11 until you’ve applied all the sheets. Stick each consecutive sheet right next to the previous one. If the paper is plain, the edges can overlap. Otherwise, remember to line up the pattern.
Step 13: Flatten the seams
Lastly, once you’ve hung all the sections, you can smooth over the seams. Doing this will help the wallpaper to stick properly and also help to neaten the look.
Glide the seam roller over all the seams as well as the edges.
Like a fresh coat of paint
Hanging wallpaper on your mobile home ceilings can be the perfect way to create a fresh new look. It can be quite a challenge to keep up with the latest home trends. But luckily, this is one renovation that can be easy, quick, and budget-friendly.
Best of all, you can pair this with many of the other decorating trends for 2020 like monochromatic palettes for your mobile home and many other exciting bedroom and bathroom trends.
About EZ Homes Design Team
The team behind the scenes at EZ Homes. Bringing you fresh ideas about mobile home lifestyle and design.